Finding the perfect climate control solution is paramount, and increasingly, homeowners are turning to split system installation. Why? Their efficiency, flexibility, and relatively quiet operation make them a popular choice. But while the units themselves are impressive, the key to unlocking their full potential lies in a professional split system installation.
Let’s delve into the intricacies of this process, exploring why it’s a job best left to the experts, and what you can expect along the way.
Understanding the Split System Advantage
Before we dive into the installation itself, it’s essential to understand the core concept of a split system. Unlike traditional window units, split systems separate the noisy compressor and condenser (outdoor unit) from the evaporator and fan (indoor unit). This separation minimizes noise disruption within your living spaces and allows for more flexible placement of the indoor unit.
These systems offer zoned cooling and heating, meaning you can control the temperature in individual rooms or zones, maximizing energy efficiency and comfort. This versatility makes them ideal for homes of various sizes and layouts.
The Importance of Professional Split System Installation
While DIY projects can be tempting, split system installation is a complex procedure that demands specialized knowledge and skills. Improper installation can lead to a host of problems, including reduced efficiency, increased energy bills, leaks, and even system failure. Here’s why hiring a qualified technician is crucial:
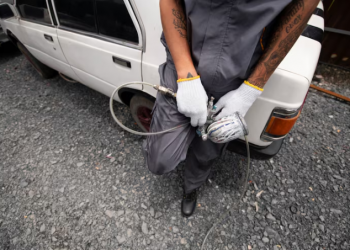
- Refrigerant Handling: Split systems utilize refrigerants, which are regulated substances. Improper handling can be hazardous to both your health and the environment. Certified technicians are trained to handle refrigerants safely and responsibly, ensuring proper charging and preventing leaks.
- Electrical Expertise: The installation involves electrical wiring, which can be dangerous if not handled correctly. A licensed electrician will ensure the system is wired safely and complies with local electrical codes.
- Optimal Placement: The placement of both the indoor and outdoor units significantly impacts the system’s performance. Technicians consider factors like airflow, sun exposure, and structural integrity to determine the optimal locations for each unit.
- Proper Sealing and Insulation: Correct sealing and insulation are essential to prevent air leaks and ensure optimal efficiency. Professionals use specialized tools and materials to create airtight connections, minimizing energy loss.
- System Commissioning: After installation, a thorough system commissioning is crucial. This involves testing the unit’s functionality, checking for leaks, and ensuring proper airflow. Technicians will also calibrate the system to ensure it operates at peak performance.
- Warranty Compliance: Many manufacturers require professional installation for warranty validity. DIY attempts can void your warranty, leaving you responsible for costly repairs.
The Split System Installation Process: A Step-by-Step Guide
While the specifics may vary depending on the system and the property, the general split system installation process typically involves the following steps:
- Site Assessment: A technician will visit your home to assess the installation site, considering factors like room size, layout, and structural limitations. They will also discuss your specific cooling and heating needs to determine the appropriate system size and placement.
- Indoor Unit Installation: The indoor unit is typically mounted on a wall, ensuring proper airflow and accessibility. The technician will drill a small hole through the wall to connect the refrigerant lines and electrical wiring.
- Outdoor Unit Installation: The outdoor unit is typically placed on a concrete slab or mounted on a wall bracket. The technician will ensure the unit is level and has adequate clearance for proper airflow.
- Refrigerant Line Connection: The refrigerant lines, which carry the refrigerant between the indoor and outdoor units, are carefully connected and secured.
- Electrical Connection: The electrical wiring is connected, ensuring proper grounding and compliance with electrical codes.
- Vacuuming and Refrigerant Charging: The system is vacuumed to remove any air or moisture from the refrigerant lines. The refrigerant is then charged to the manufacturer’s specifications.
- System Testing and Commissioning: The system is thoroughly tested to ensure proper operation, including airflow, temperature control, and leak detection.
- Customer Education: The technician will explain how to operate the system, including adjusting temperature settings, cleaning filters, and scheduling maintenance.
Investing in Comfort and Efficiency
A properly executed split system installation is an investment in your home’s comfort and energy efficiency. While the initial cost may seem higher than a DIY approach, the long-term benefits, including reduced energy bills, improved comfort, and extended system lifespan, far outweigh the expense.
By entrusting your split system installation to a qualified professional, you can ensure a seamless and efficient process, allowing you to enjoy the benefits of a comfortable and climate-controlled home for years to come. Don’t compromise on your comfort; choose expert installation and breathe easy.